

iPhone Shooting Workflow: Blackmagic Camera × Apple Log Guide (Settings, LUTs, and Tips to Avoid Mistakes)
If you want richer footage from your iPhone, pair Blackmagic Camera (free) with Apple Log.
In this guide, I share the settings I actually use, how to load LUTs, and tips to avoid common mistakes.
What you'll learn
- Basic Blackmagic Camera settings (codec, color space, frame rate)
- How to load LUTs and see them live while shooting
- Tips to get shutter speed and exposure right
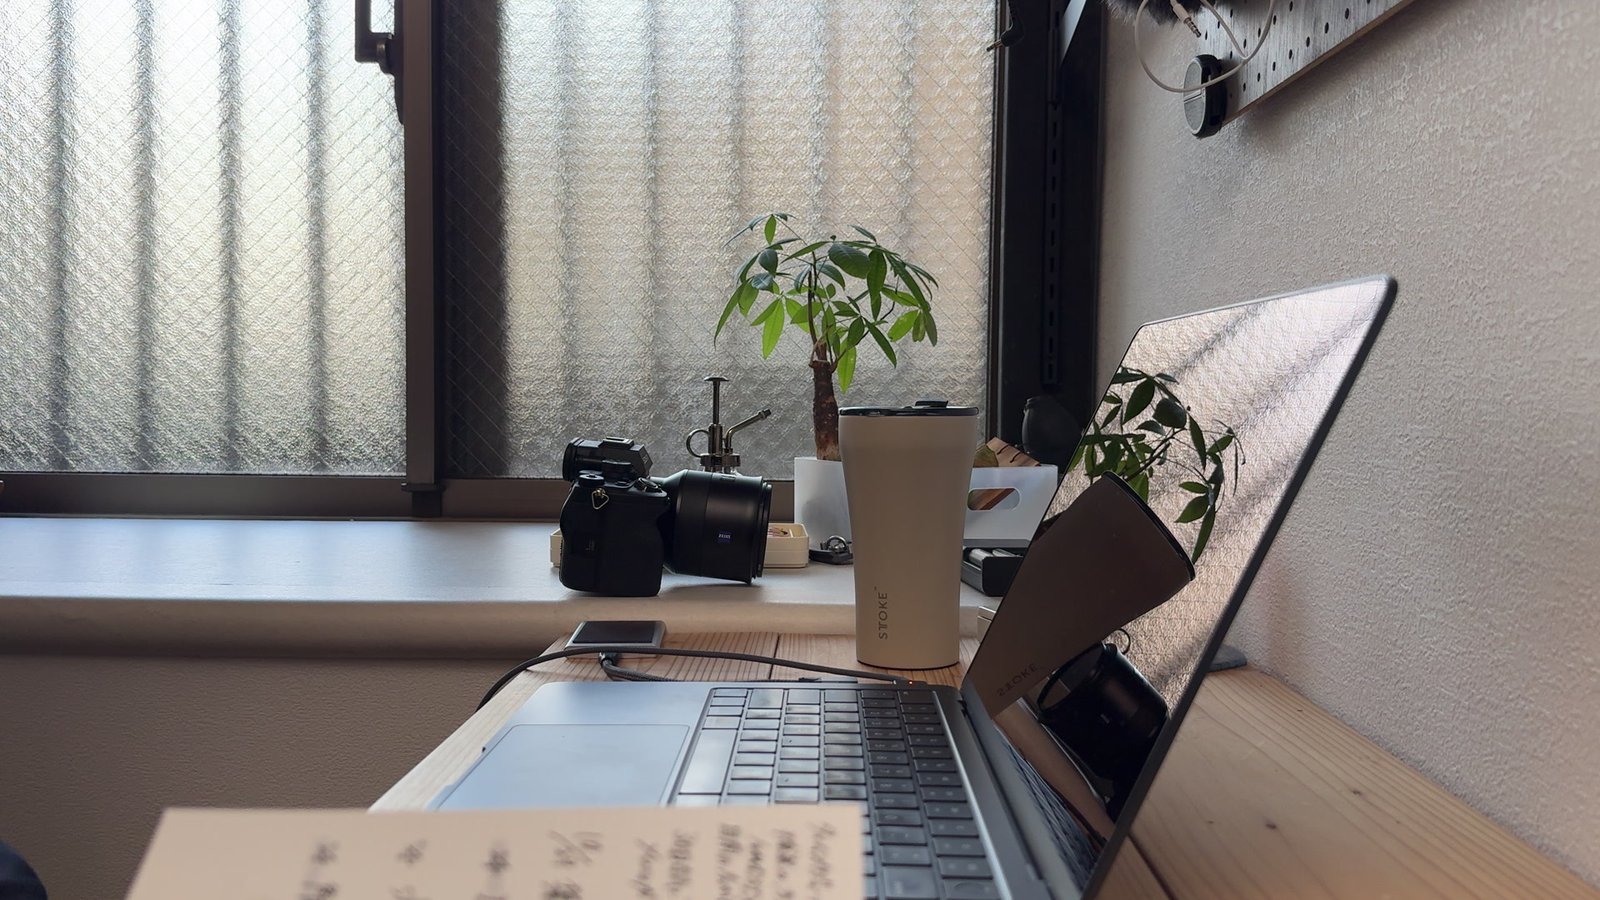
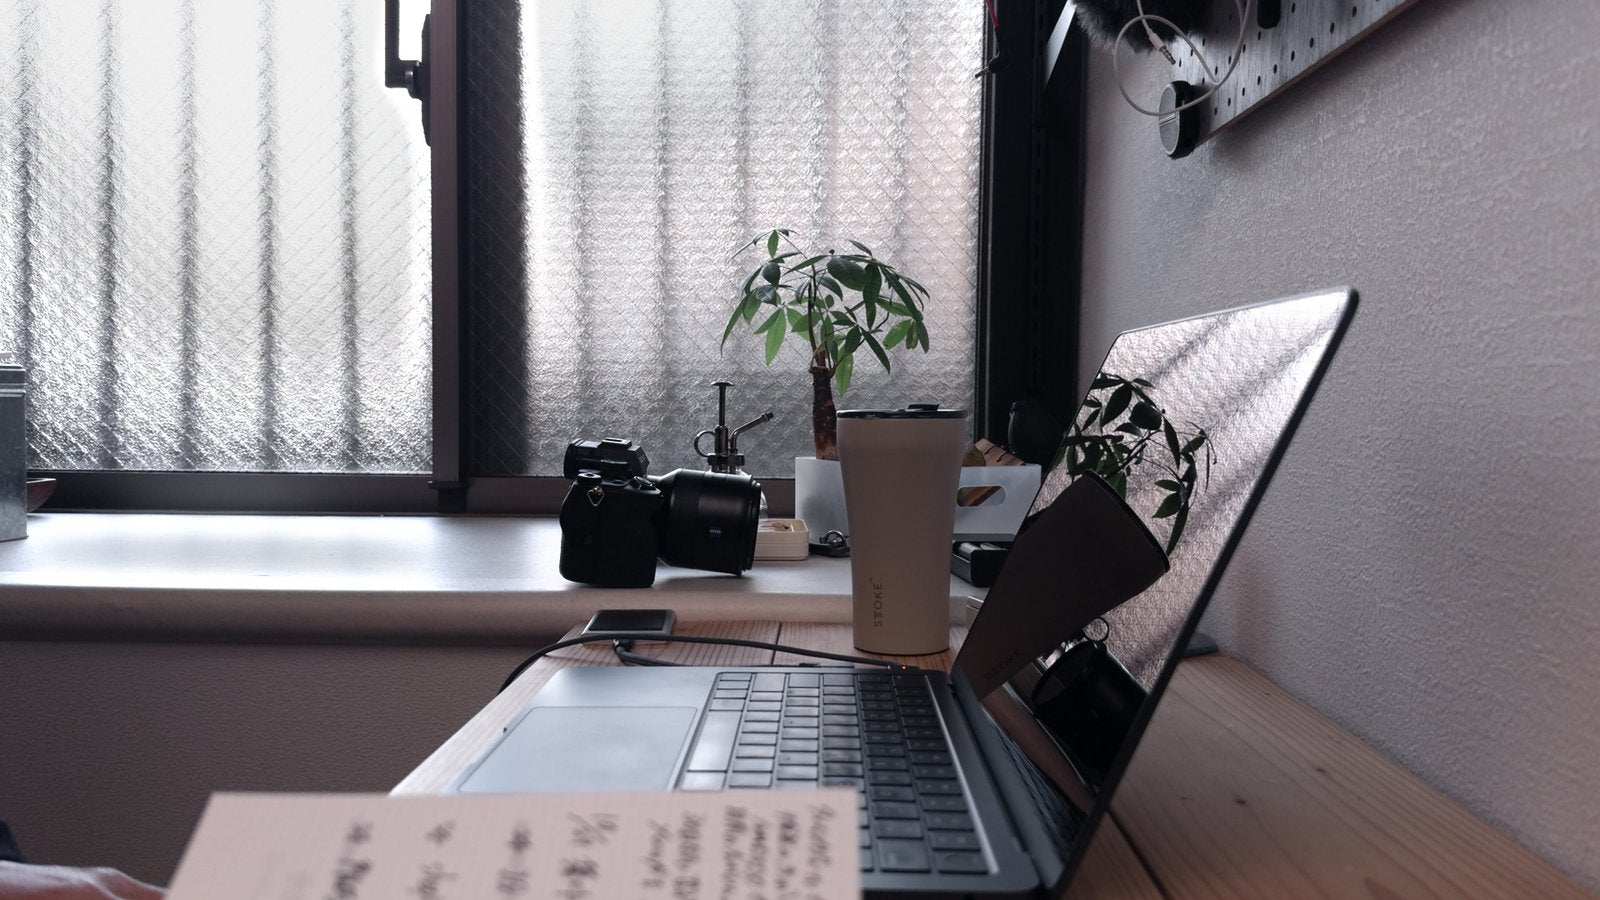 iPhone Camera (SDR)Apple Log + LUT
Drag the slider to compare (left: iPhone Camera app / right: Apple Log + LUT "Still Mist")
What changes when you shoot in Log?
Same place, same light: I shot with the iPhone Camera app (SDR) and with Blackmagic Camera (Apple Log) to compare.
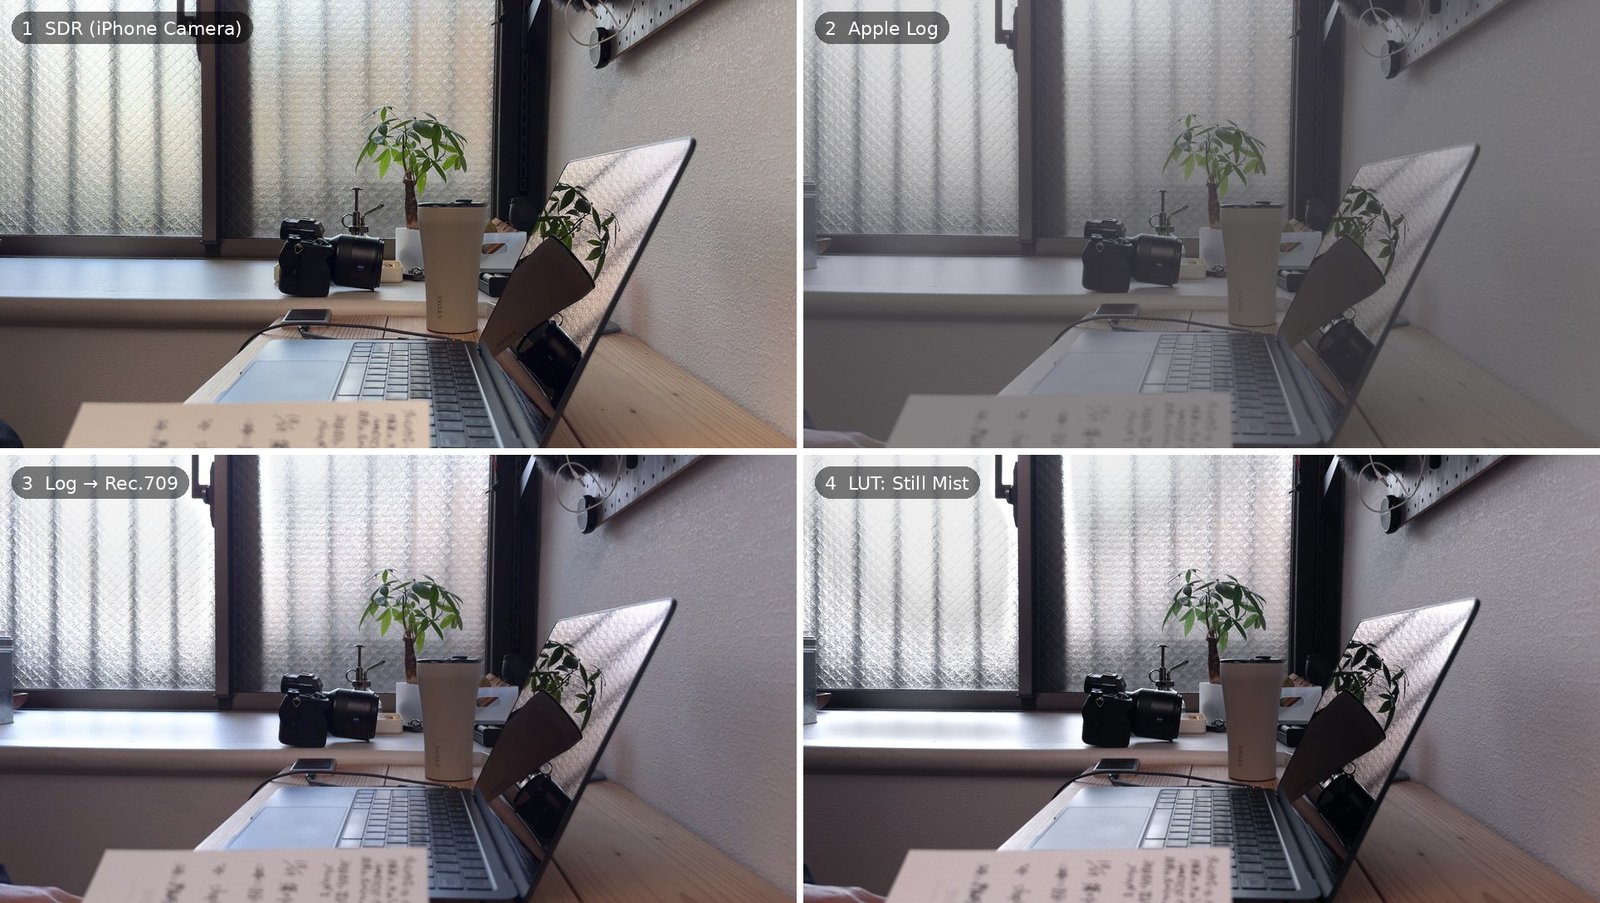
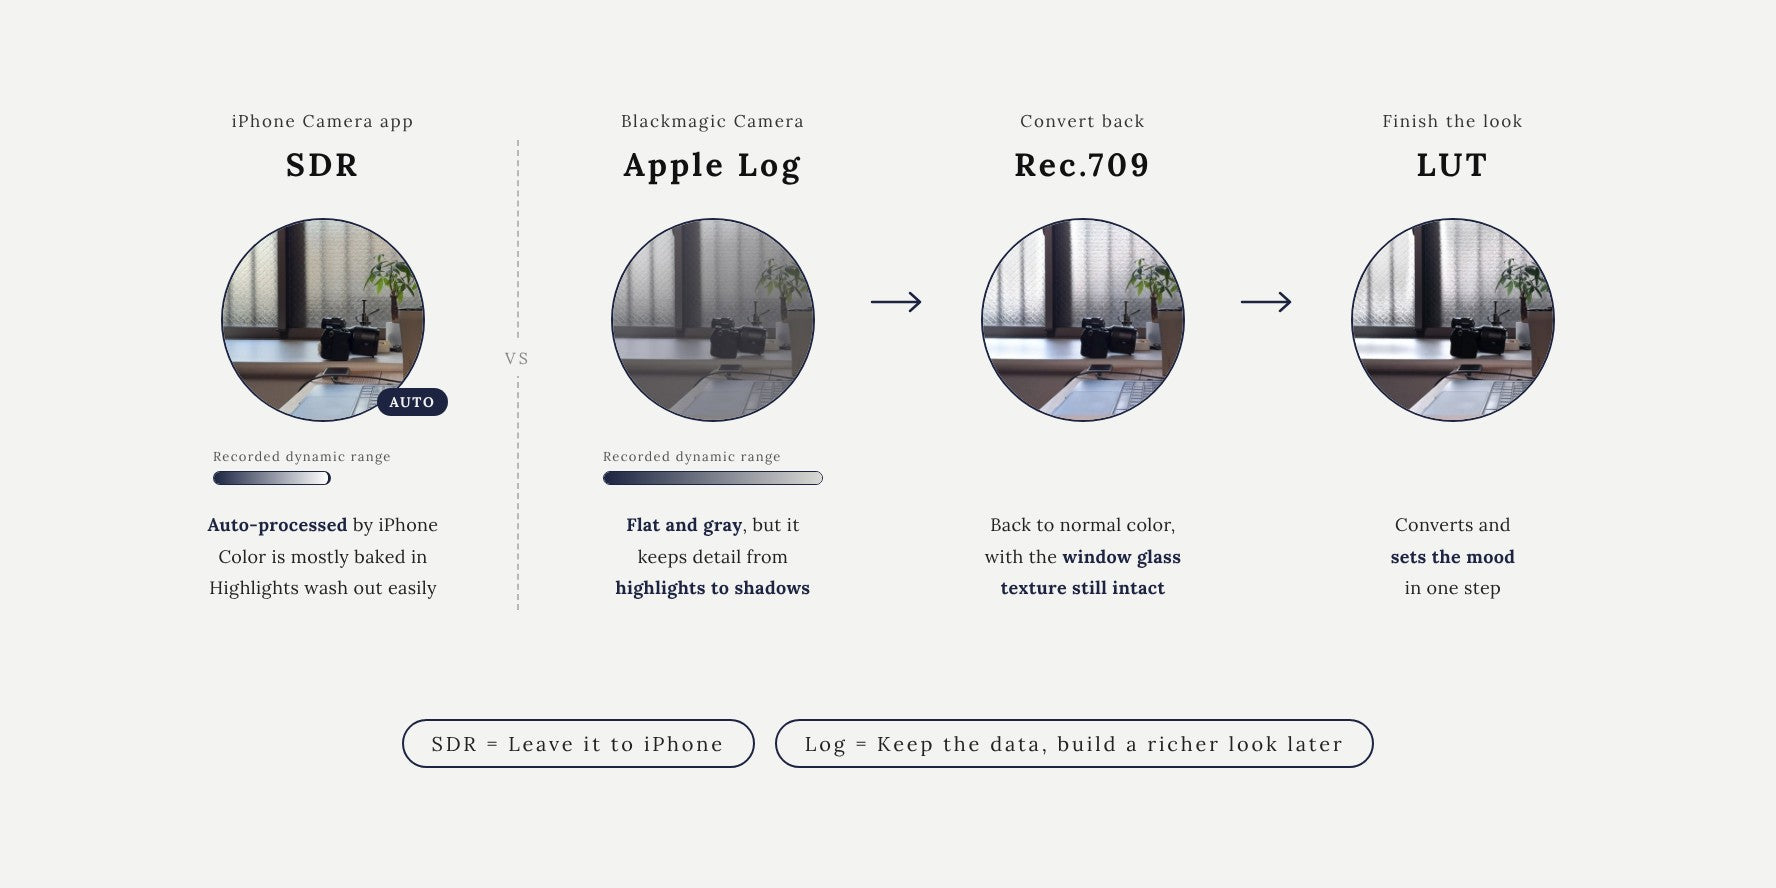
Log isn't footage you use straight out of the camera. It's material you finish into your own look later.
It takes a little extra work, but highlights hold up better and you're free to create any color you like.
What you need
- An iPhone that supports Apple Log: iPhone 15 Pro / 15 Pro Max or later Pro models
- Blackmagic Camera app: Free download on the App Store
- Free storage: ProRes files are large. On days with long takes, make sure you have plenty of free space.
- LUTs (.cube): For checking color live while shooting, and for finishing in the edit
- Nice to have: A variable ND filter (for sunny outdoor shoots)
1. Basic settings
Open Settings at the bottom right of the app. Here are my settings.
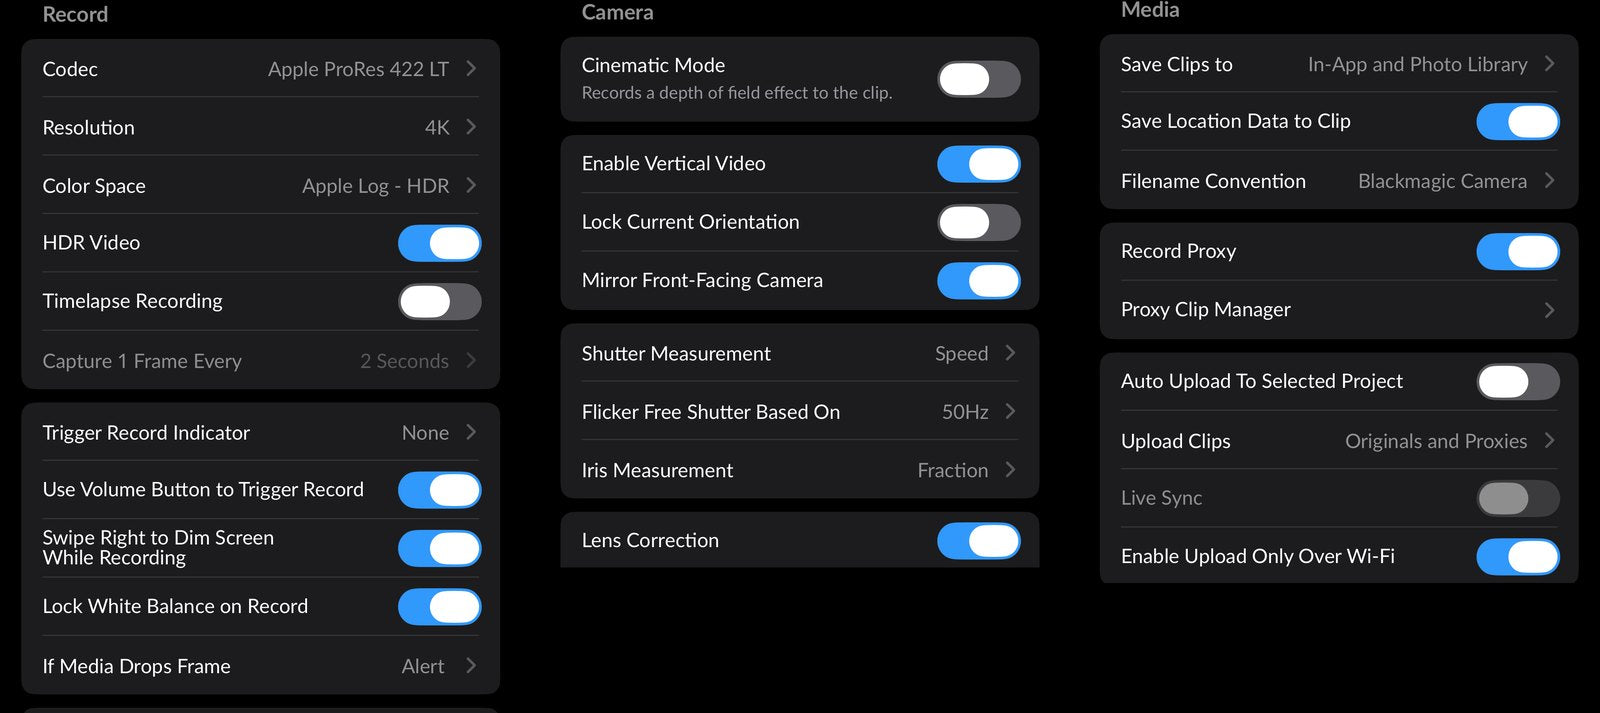
- Codec: Apple ProRes 422 LT
- Resolution: 4K
- Color Space: Apple Log - HDR
- Frame Rate: 24fps
- Enable Vertical Video: ON (when shooting vertical video)
- Lock White Balance on Record: ON
- Flicker Free Shutter Based On: 50Hz or 60Hz, matching your local power frequency (in Japan: 50Hz in the east, 60Hz in the west)
- Lens Correction: ON
- Record Proxy: ON
- Save Clips to: In App and Photos Library
Tip: I use ProRes 422 LT because it strikes a good balance between file size and quality.
Recording proxies (lightweight editing files) at the same time makes editing smoother on a phone or laptop.
2. Load your LUTs
Apple Log footage looks gray and flat as is.
A LUT adds contrast and color. Blackmagic Camera can display the LUT while you shoot,
so you can see the finished look as you record.
- Save the LUT file (.cube) to the Files app
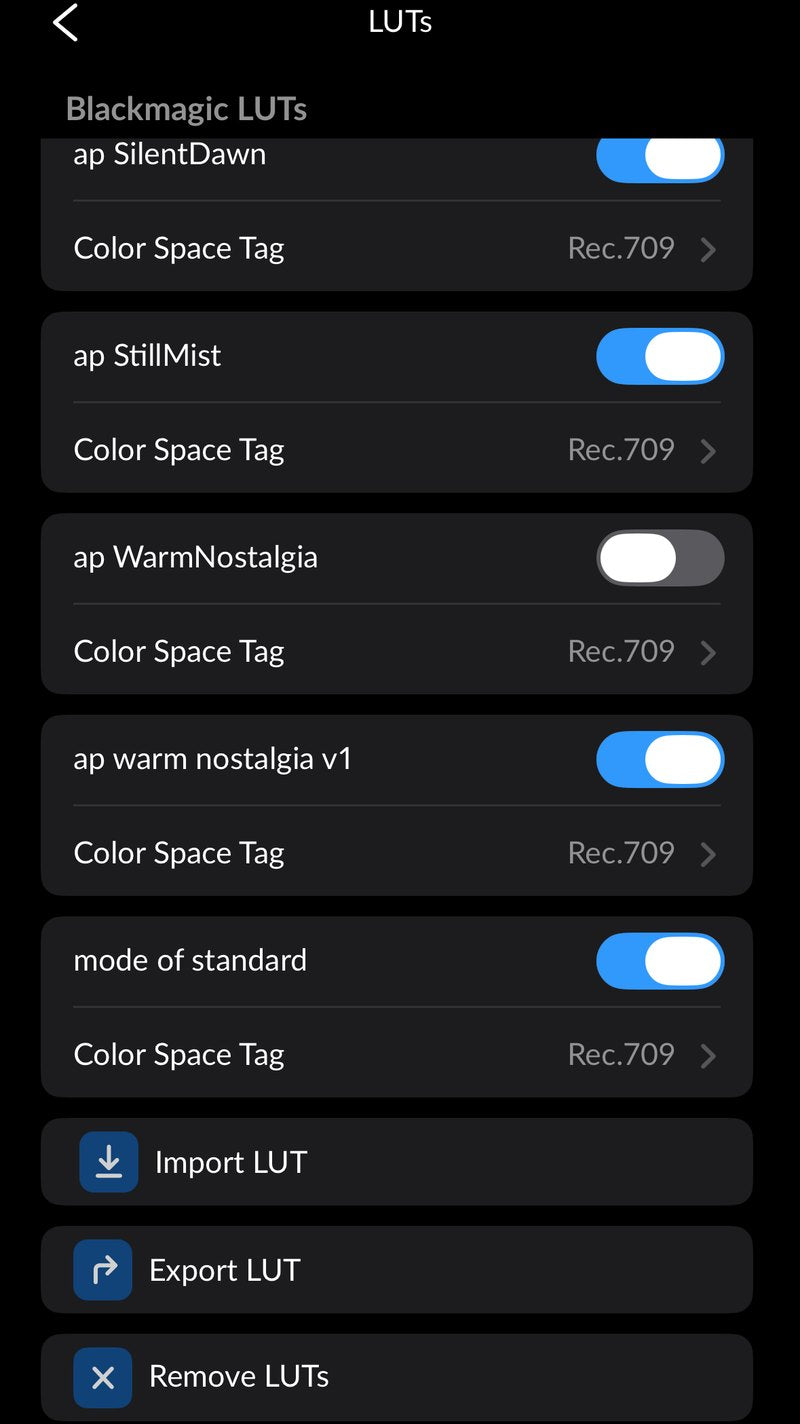
- In Blackmagic Camera, open Settings → LUTs → LUTs Manager
- Tap "Import LUT" and load the .cube you saved
- Turn on the LUT on the shooting screen and use it as a Display LUT
Bake it in or not? With "Record LUT to Clip" under LUTs in Settings, you can choose to record the LUT into the footage (on) or use it for display only (off).
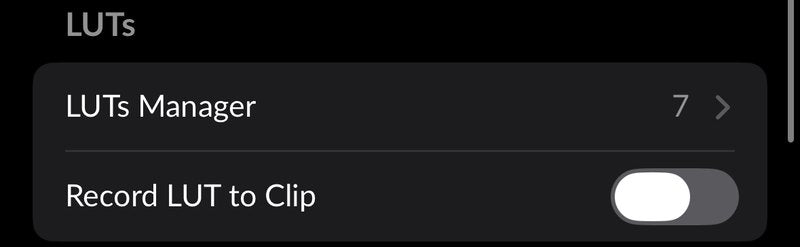
- Don't bake in (recommended): Footage is recorded as Log, so you can adjust exposure and color later. Apply the same LUT in your edit to finish it.
- Bake in: Use the finished color right after shooting. But you can't undo it later.
3. Start with a 1/50 shutter
When shooting at 24fps, a shutter speed of 1/50 is the standard and gives natural motion blur.
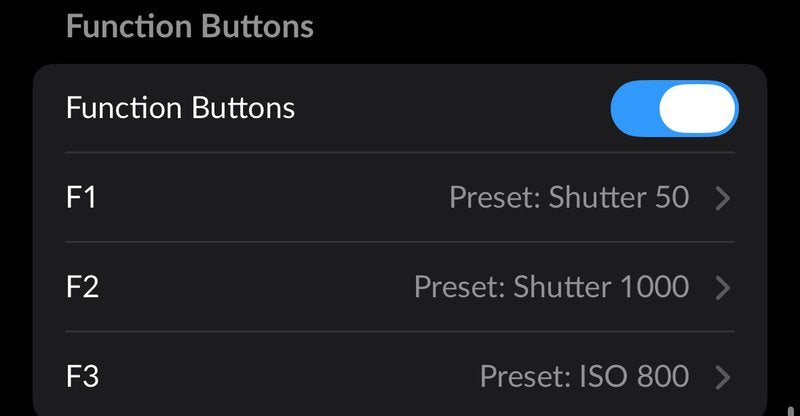
Assign the settings you use most to the function buttons (F1–F3) to switch instantly.
- F1: Shutter 1/50 (indoors, or when using an ND filter)
- F2: Shutter 1/1000 (sunny outdoors without an ND filter)
- F3: ISO 800 (for dark places when you really need more light)
Tip: At 1/1000, motion looks choppy. For serious shots, I recommend using an ND filter to cut the light and keep 1/50. The higher the ISO, the more noise. I usually set exposure so I stay at ISO 400 or lower.
4. Judge exposure with the LUT on
The most common mistake with Apple Log is exposure.
Log footage looks gray overall, so it's hard to notice blown highlights or underexposure.
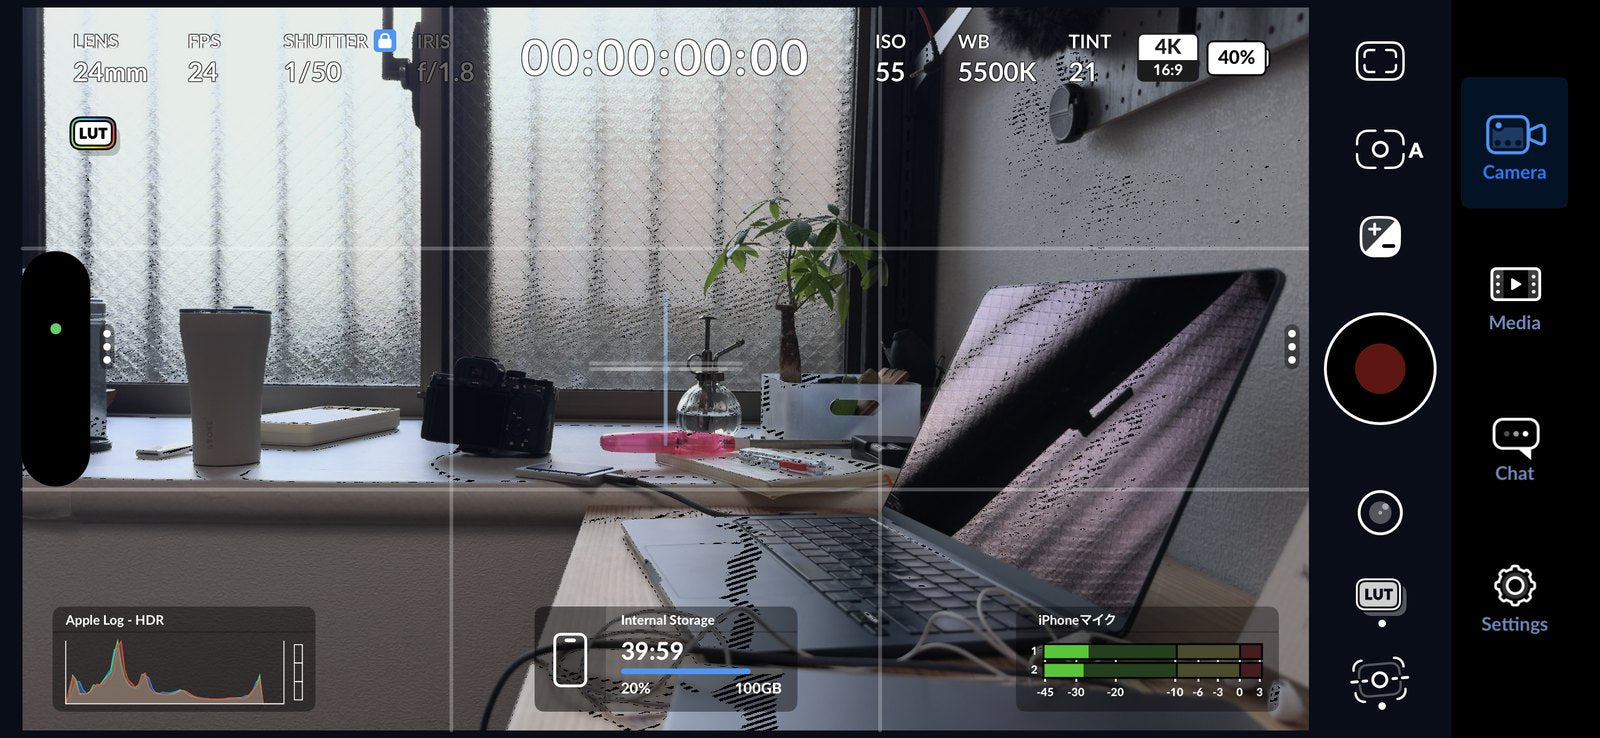
- Show the histogram (the graph at the bottom left) and check that it isn't pressed against the right edge (white)
→ Pressed against the right means the bright areas are blown out. Pressed against the left means the darkest areas are crushed. - Display the LUT live and check for blown highlights in the finished look
- If bright areas like the sky or windows are about to clip, go a little darker
- But shooting too dark adds noise when you brighten it later.
Expose as bright as you can without clipping the highlights. In a dark room, adding a light also helps.
5. Focus and white balance
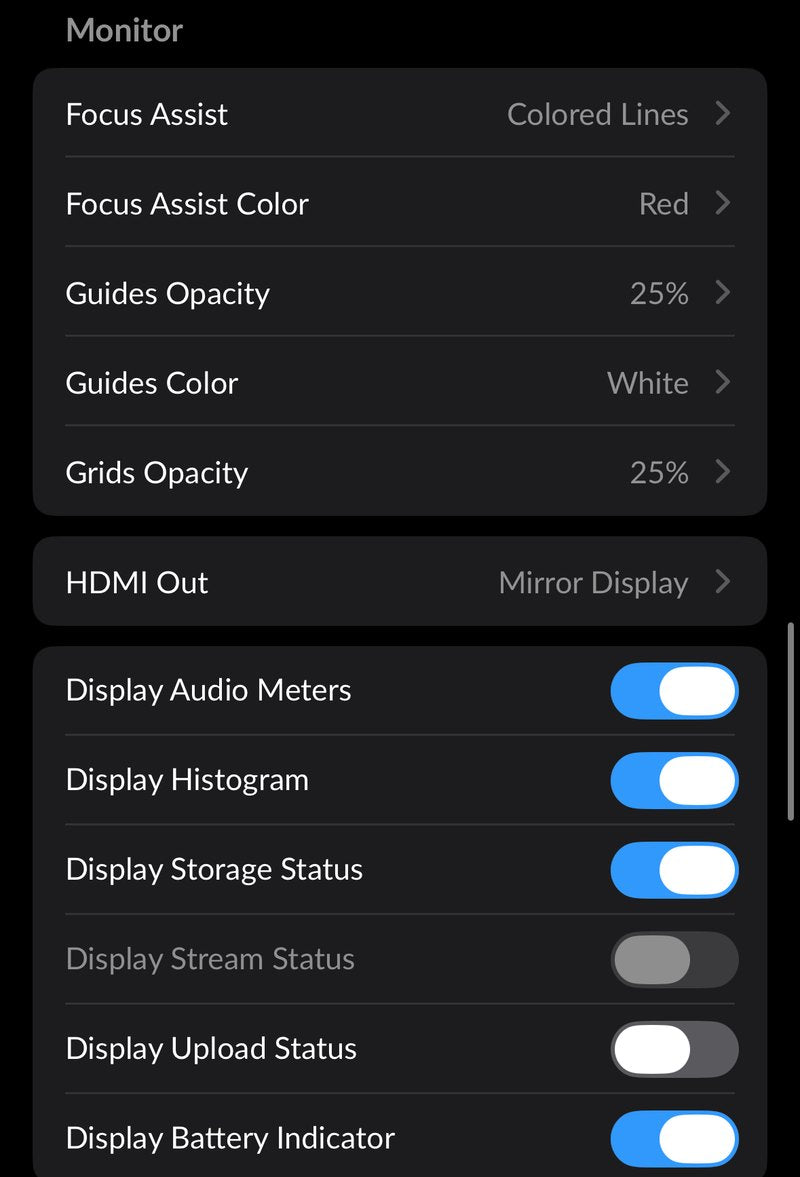
- Focus Assist: Set it to colored lines (red) so in-focus edges are highlighted, which makes focus easy to see.
- Lock white balance: Turn the lock ON so the color doesn't shift while recording. This keeps color consistent from cut to cut. If you're new to it, choosing a preset like Tungsten or Cloudy is a good start.
6. After shooting: finish with a LUT
Apply the same LUT you used while shooting in your editing app (DaVinci Resolve on desktop, Liit or similar on your phone),
and you'll get the look you saw on set. The trick is to fix exposure and white balance before applying the LUT.
How to load LUTs in each app is covered here
→ How to Use LUTs | DaVinci Resolve (Desktop) and Blackmagic Camera & Liit (iPhone)
Summary: 6 tips to avoid mistakes
- Start with ProRes 422 LT + Apple Log + 24fps
- Keep the shutter at 1/50. On very bright days, use an ND filter
- Aim for ISO 400 or lower and don't push it too high
- Check exposure with the LUT on and with the histogram
- Lock white balance
- Shoot with the LUT not baked in, and apply the same LUT in the edit
LUTs used in this guide
mode of... LUTs are created in DaVinci Resolve.
They support iPhone Apple Log, Sony S-Log, and normally shot footage (Rec.709), and load straight into Blackmagic Camera.