

How to Use LUTs | DaVinci Resolve (Desktop) and Blackmagic Camera & Liit (iPhone)
Bought a LUT (.cube file) but not sure how to use it?
This guide covers DaVinci Resolve on desktop, and Blackmagic Camera and Liit on your phone.
The same steps work for mode of... LUTs and for any other .cube LUT.
What you'll learn
- How to use LUTs on desktop (DaVinci Resolve)
- How to use LUTs on your phone (Blackmagic Camera / Liit)
- The right order and a few tips for a clean result
Before you start: 3 basics of applying a LUT
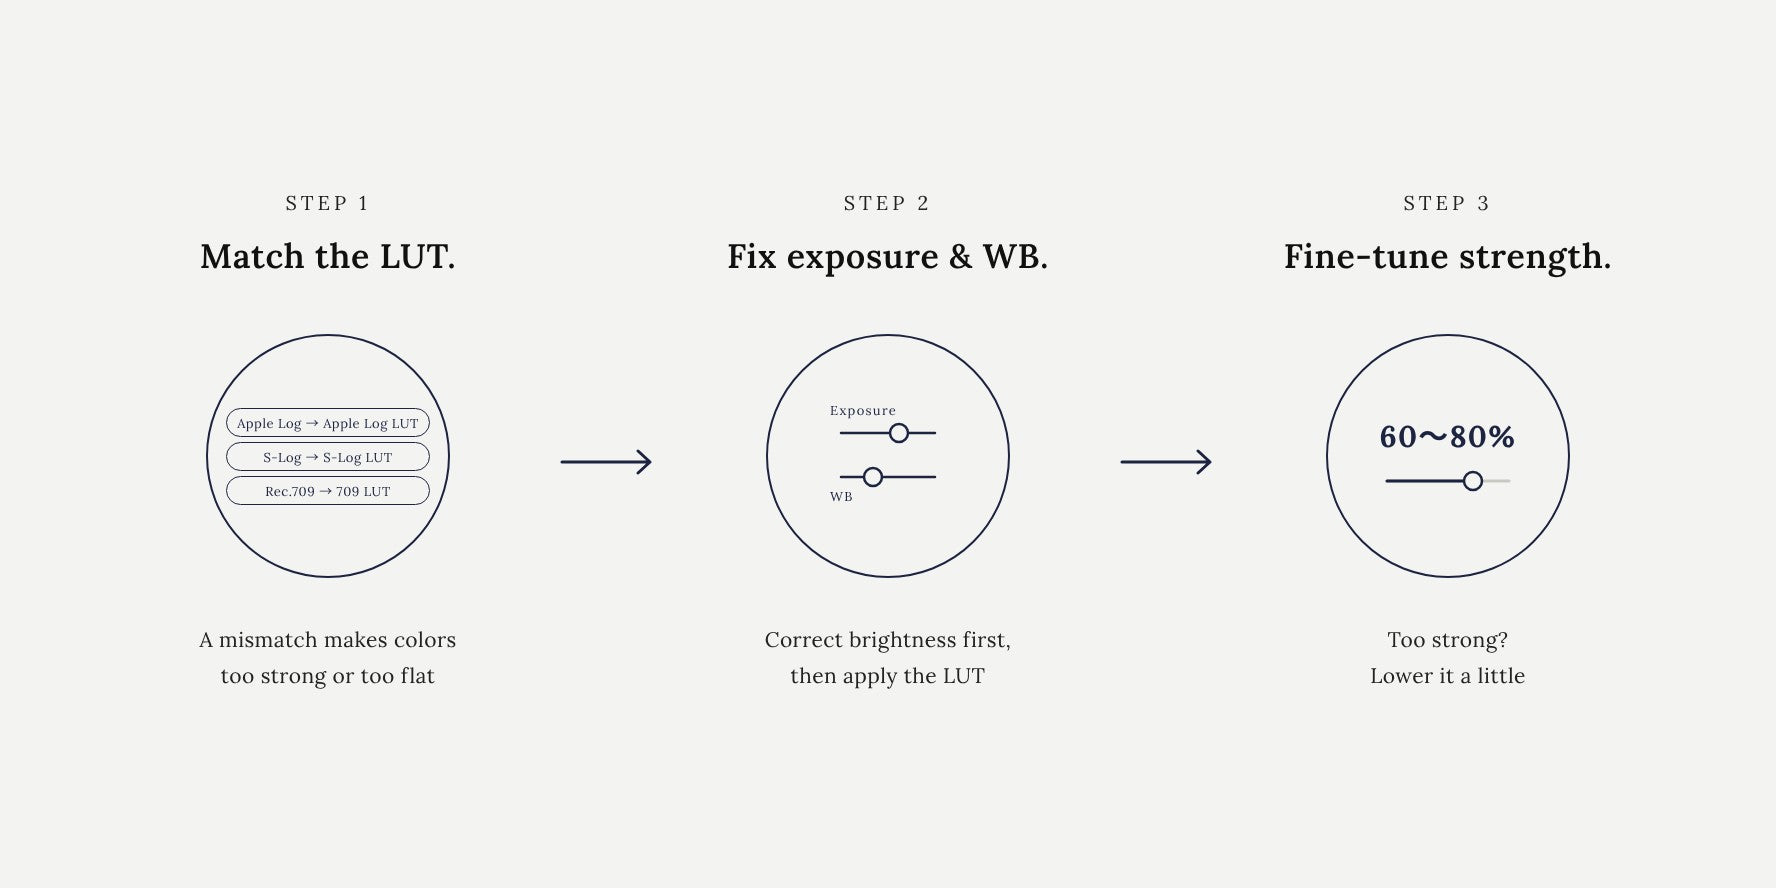
- Match the LUT to your footage (Log type): Use an Apple Log LUT for iPhone Apple Log footage, an S-Log LUT for Sony S-Log, and a 709 LUT for normally shot footage. A mismatch makes colors too strong or too flat.
- Fix exposure and white balance first: LUTs are designed to be applied to well-balanced footage. Correct anything too dark or too bright first, and you'll get the intended look.
- Fine-tune the strength: If it feels too strong, try lowering the opacity or strength slider to around 60–80%.
DaVinci Resolve (Mac / Windows)
DaVinci Resolve is free video editing software, also used for color grading on feature films. There are a lot of controls, which can feel overwhelming at first, but that's what makes serious color work possible. The free version is all you need to apply LUTs.
- Open File → Project Settings → Color Management
- Near the bottom, click "Open LUT Folder" and copy your .cube files into that folder (copying the whole folder is fine too)
- Click "Update Lists"
- On the Color page, right-click a node → LUT → choose the LUT you added
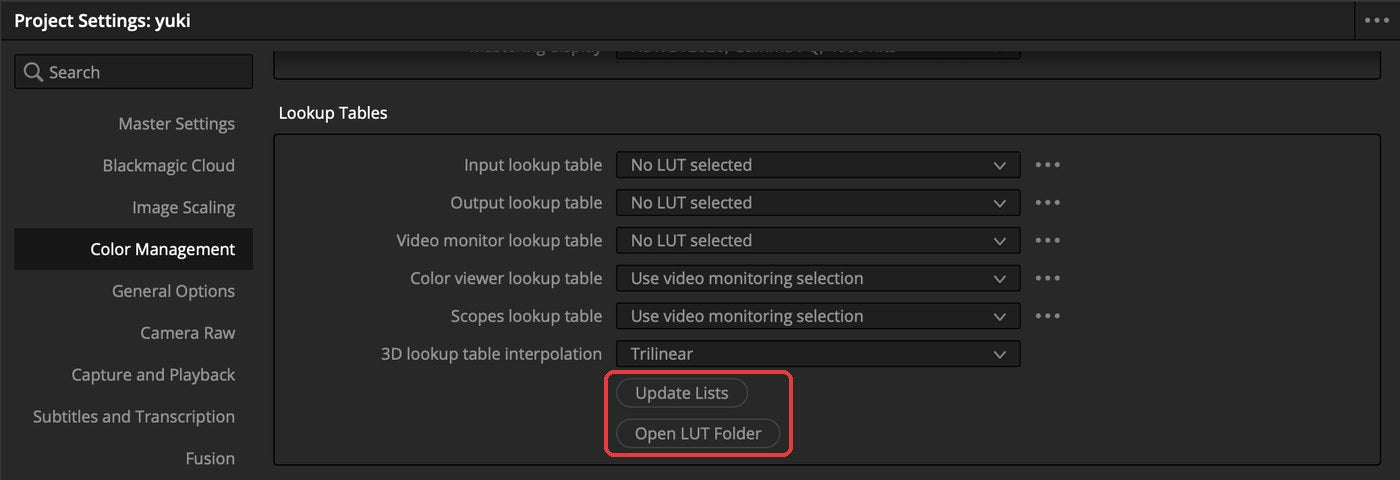
Tip: Create two nodes. Use the first to set exposure (brightness) and white balance (so white things look white), and apply the LUT on the second. This makes adjustments much easier.
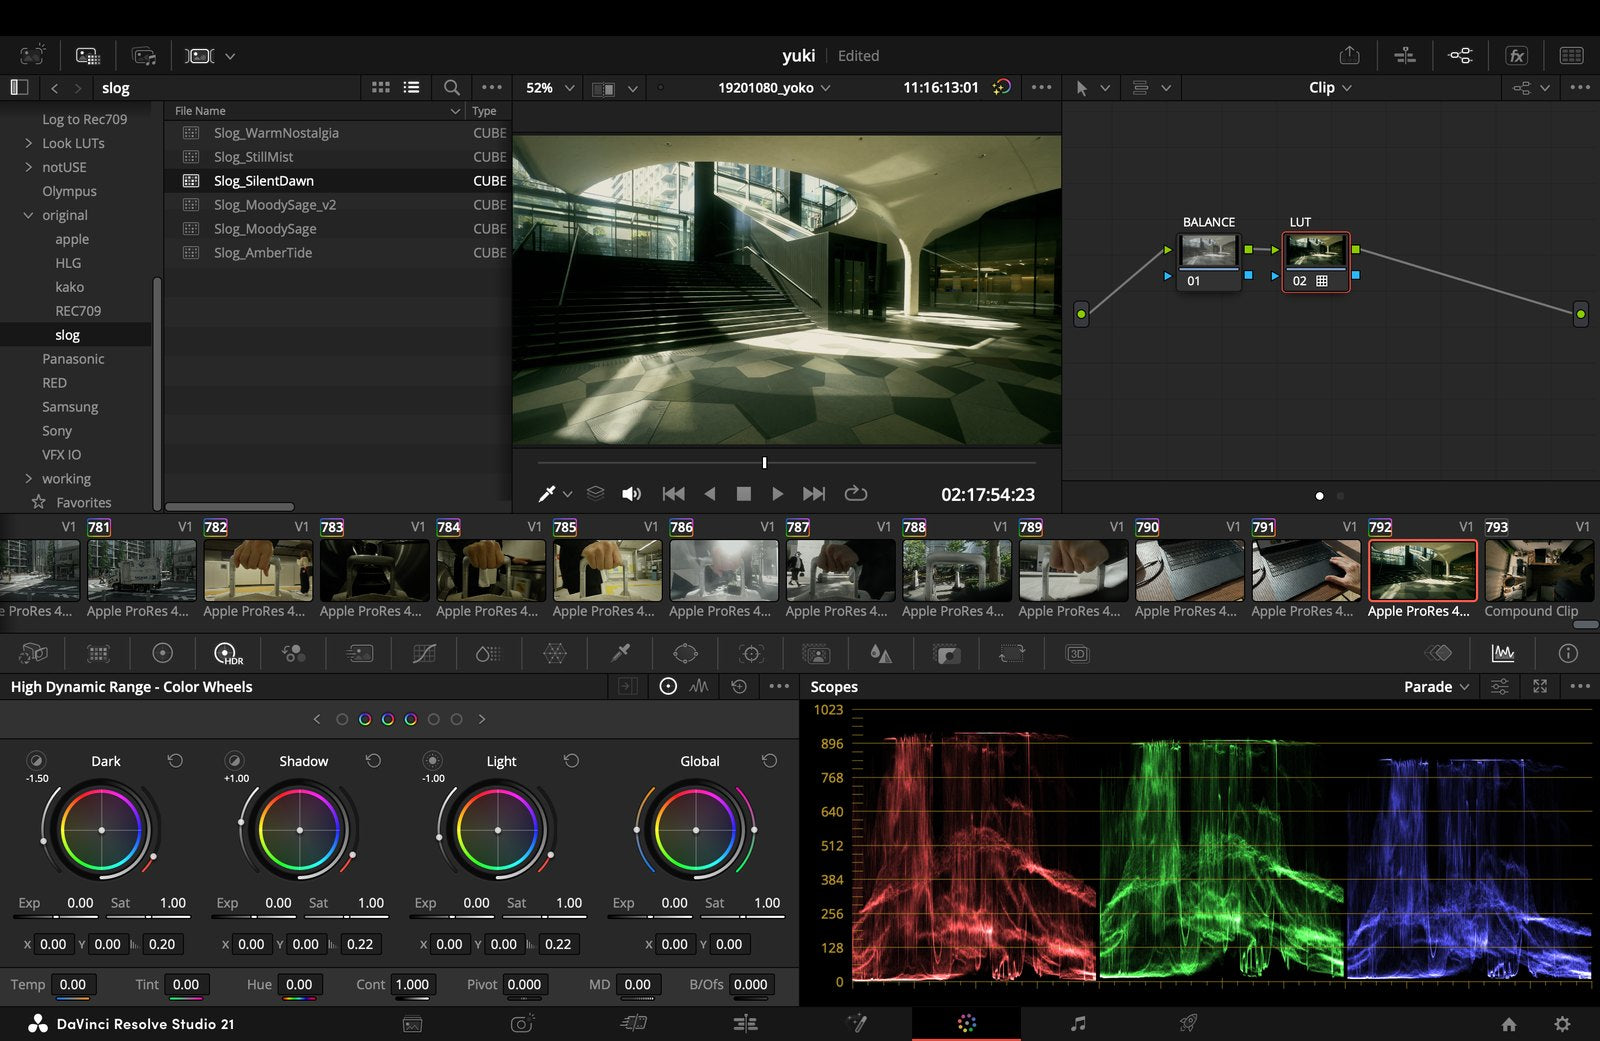
Adjusting strength: DaVinci has no dedicated LUT strength slider. Select the node with the LUT and set the Gain of "Key Output" in the Key palette to 0.6–0.8 to reduce the strength to 60–80%.
Using LUTs on your phone (iPhone)
On your phone, we recommend shooting with Blackmagic Camera and finishing the color in Liit.
When shooting with Blackmagic Camera, you can either "keep it as Log" or "bake in the LUT (record the color as you see it)".
1. Import LUTs into Blackmagic Camera
App: Blackmagic Camera (App Store, free)
- Save the .cube file to the Files app
- In Blackmagic Camera, go to Settings → LUTs → LUTs Manager and tap "Import LUT"
- Turn on the LUT on the shooting screen
For detailed settings and shooting tips, see this guide → Blackmagic Camera × Apple Log Shooting Guide
2. Two ways to shoot: keep it Log, or bake in the LUT
Switch between them with "Record LUT to Clip" in Settings.
Off saves the clip as Log; on saves it with the LUT baked in.
You can also toggle it on the shooting screen.
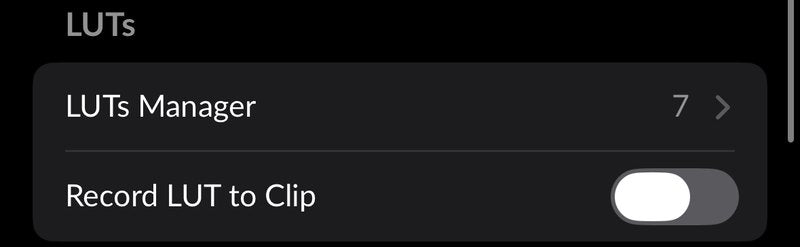
- Keep it as Log (off): More flexibility when editing. You can try different LUTs and change the look later.
- Bake in the LUT (on): For when you want to use the clip right away. Note that the color can't be undone later.
How I use them: I bake in the LUT when I want to post quickly to Instagram Stories or X, or for casual everyday clips. ProRes files are large, though, so I sometimes export the color-baked clips smaller in an app like CapCut before using them.
3. Finish your Log footage in Liit
App: Liit (App Store)
Once your LUTs are added to Liit, you can freely apply any look to your Log footage.
You can also adjust brightness and contrast, and add frames.
- Open Liit and choose a video shot in Log
- From the bottom menu, go to Filter → Import and load your .cube files (once imported, just pick them from the list next time)
- Tap a LUT in the list to apply it. If it's too strong, adjust the strength with the slider
- If needed, fine-tune brightness and contrast under Adjust, and add a border or shooting info under Frame
- Tap "Save" in the top right to export
This confused me at first too: Liit is an editing app for adding color, and it has no album for storing videos. When you're done editing, tap "Save" and the video is saved to the iPhone Photos app.
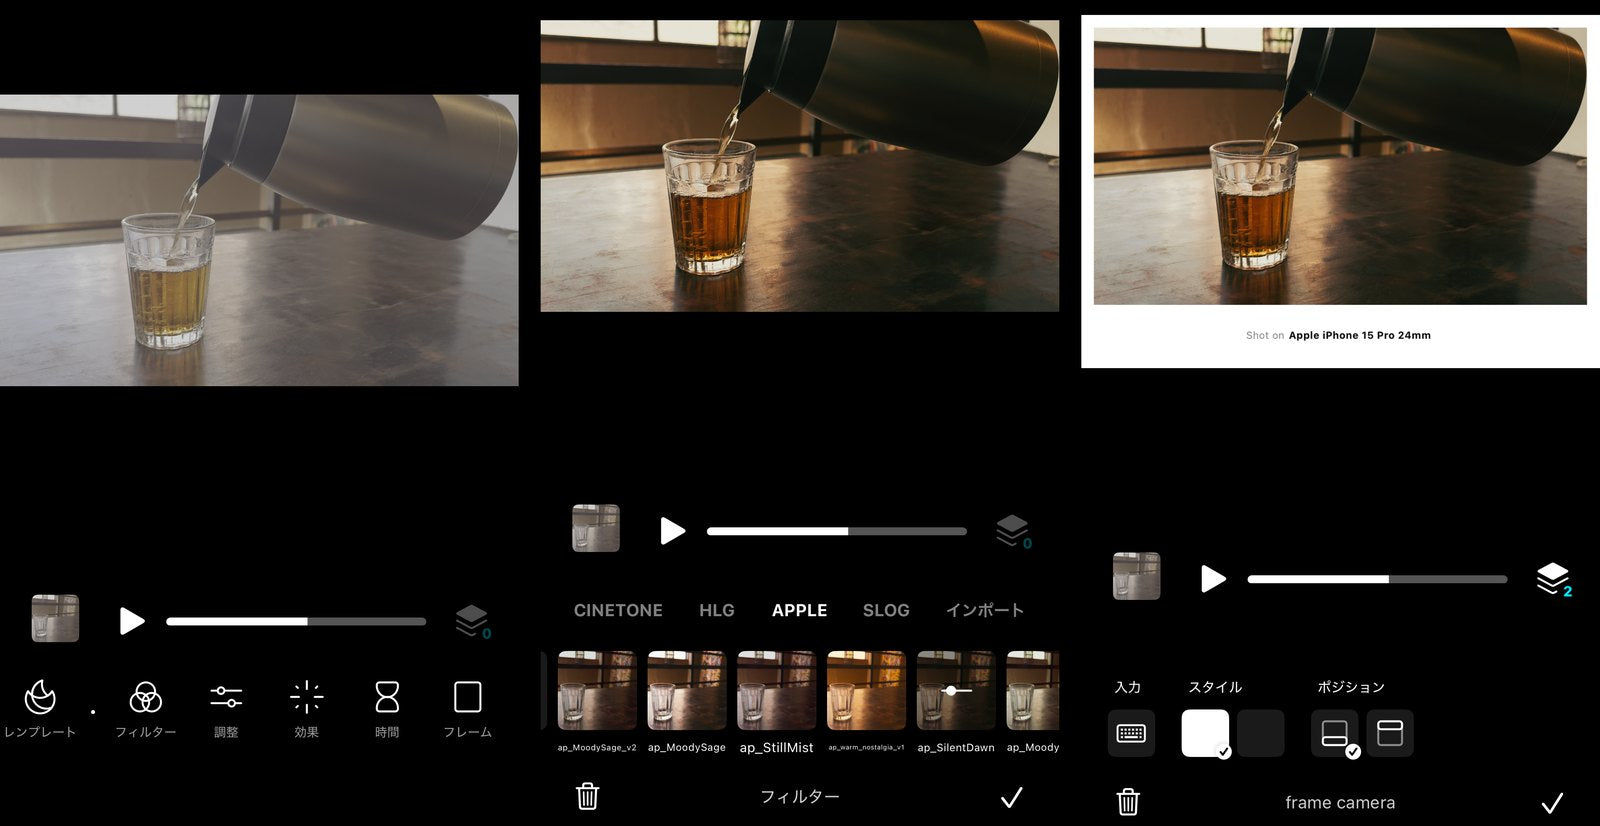
Left: Log as shot / Center: LUT (Silent Dawn) applied / Right: Frame added
* Menu names may vary slightly depending on the app version.
Common mistakes
- Colors too strong or highlights blown out: The LUT type doesn't match your footage, or the exposure is too bright.
Choose the LUT that matches your footage and try lowering the exposure a little before applying it. - The LUT doesn't show up in the list: In DaVinci, click "Update Lists".
- Want to use it on normally shot (non-Log) footage: mode of... also offers LUTs for normally shot footage (Rec.709). Use the LUTs with "709" in the name.
mode of... LUTs
Cinematic LUTs I created in DaVinci Resolve.
They support iPhone Apple Log, Sony S-Log, and normally shot footage (Rec.709), and work in every app covered in this guide.